
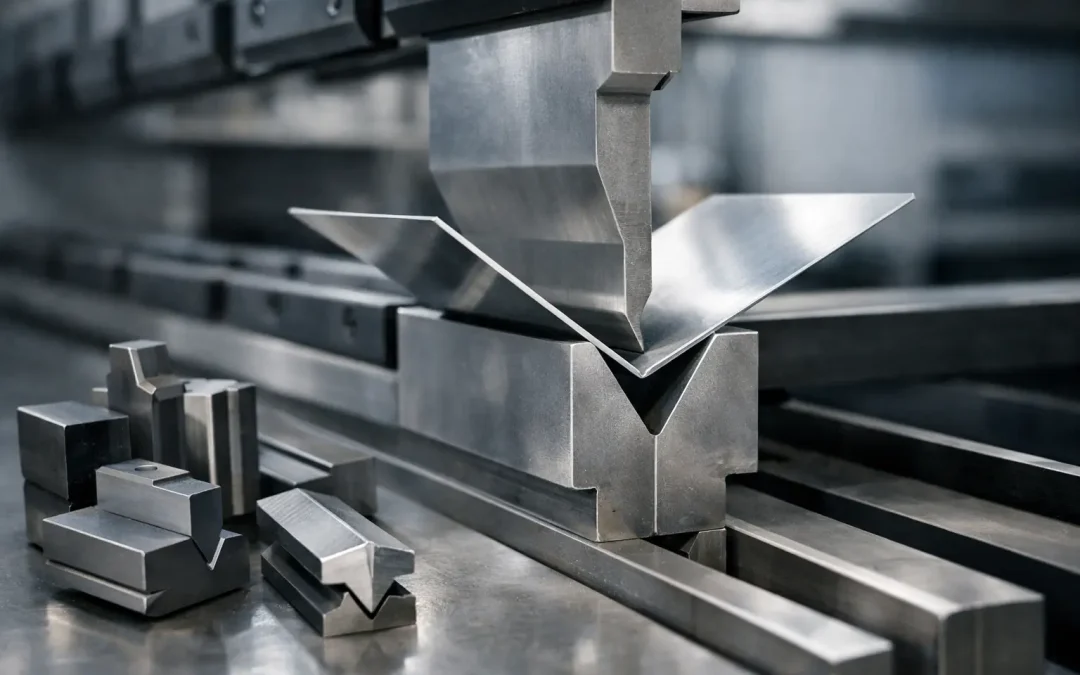
A press brake can have plenty of tonnage, a reliable control, and a capable operator, yet still produce inconsistent parts if the tooling is wrong for the job. This press brake tooling guide focuses on the decisions that affect bend quality, setup time, machine safety, and the usable value of your equipment.
For fabrication shops, tooling is not a secondary purchase. It determines what material ranges you can run, how quickly you can change over, whether formed features remain consistent, and how much risk the machine carries during demanding work. The right tool package supports profitable production. The wrong one creates cracked flanges, marked material, poor angles, excessive tonnage, and avoidable downtime.
Start With the Part, Not the Tool Rack
Tooling selection should begin with the finished part requirements: material type, thickness, bend angle, inside bend radius, flange length, part length, and cosmetic expectations. A 90-degree bend in 16-gauge mild steel is not the same application as a tight-radius bend in stainless or a cosmetic panel in prefinished aluminum.
Material properties change the calculation. Stainless steel generally requires more tonnage than mild steel and has greater springback. Aluminum can mark easily and may require protective tooling or film. High-strength materials can exceed the capacity of common punches and dies even when the press brake itself appears adequately sized.
Also consider the shortest flange. A die opening that works well for one bend may be too wide to support a short return flange on the same part. When a job includes hems, offsets, channels, or closely spaced bends, the tool profile and available clearance matter as much as basic tonnage.
Choose the Right Bending Method
Most press brake work falls into air bending, bottoming, or coining. Each method has a different relationship between tooling, material, and machine force.
Air bending is the most common approach in general fabrication. The punch pushes material into a V die without forcing it fully to the bottom. Because the inside radius is largely determined by the V opening, air bending offers flexibility and reduces the number of tool sets required. It is well suited to shops handling varied parts and shorter production runs, but angle accuracy depends on material consistency, operator setup, and compensation for springback.
Bottoming brings the material closer to the die angle and uses more force than air bending. It can provide more repeatable results for certain applications, although the tooling angle must closely match the desired part angle. Coining uses very high tonnage to plastically form the material at the bend line. It can minimize springback, but it places substantial load on the press brake and tooling. For many modern shops, coining is unnecessary unless a specific part requirement justifies the extra force and wear.
The practical choice depends on volume, tolerances, material variation, and available tooling. Air bending usually provides the best balance of flexibility and operating cost. It should not be treated as a shortcut, however. Consistent results still require the right die opening, punch geometry, and machine setup.
Understand Punch and Die Selection
The punch establishes the bend profile and determines whether the tool can reach the required geometry without interference. Standard 88-degree and 90-degree punches handle a wide range of work. Acute punches are used when the material must be bent beyond 90 degrees, often for springback compensation or closed-form features. Gooseneck punches provide clearance for return flanges and box-style parts that would collide with a straight punch body.
The die supports the material and has a direct effect on inside radius, tonnage, and flange capability. V dies are the standard choice for air bending. Multi-V dies offer several openings in one tool, which can be useful for lower-volume shops, though changeovers and handling still need to be planned carefully.
A common starting point for mild steel is a V opening around six to eight times material thickness. That is a guideline, not a universal rule. Thinner material, tight radius requirements, short flanges, stainless steel, aluminum, and specialty grades can all call for a different opening. Use reliable tonnage charts and the specific tooling manufacturer’s limits before loading a job.
Tooling capacity is a critical constraint. A press brake may be rated for 175 tons, but a narrow punch or die may have a lower allowable load per foot. Concentrating force in a short section can damage the tool, deform the ram or bed, and create a serious safety hazard. Confirm both total tonnage and tonnage per foot for every setup.
Radius, Springback, and Angle Control
In air bending, a larger die opening generally produces a larger inside radius and requires less tonnage. A smaller opening creates a tighter radius but increases force. Forcing too tight a radius can crack material, especially across the grain or in less-formable grades.
Springback is the material’s tendency to open after the punch is removed. Stainless, aluminum, and high-strength steel often spring back more than mild steel. Operators compensate by bending slightly past the target angle, using the appropriate punch angle, or applying controlled correction through the brake’s control. The best correction is based on test bends from the actual material batch, not assumptions from a prior job.
Tooling Systems and Compatibility Matter
Traditional American-style tooling remains common and can be cost-effective, especially on older press brakes. European-style precision tooling is widely used on newer CNC machines because it supports fast clamping, repeatable positioning, and a broad range of segmented tools. Wila-style and other precision systems can provide high accuracy and rapid changeovers, but they require compatible clamping and carry a higher investment.
When evaluating a used press brake, inspect the tooling interface before assuming your existing tools will transfer. Ram style, clamping system, tool height, safety tang configuration, and crowning capability all affect compatibility. Adapters may be available, but they can reduce daylight, add setup complexity, or create alignment concerns.
Segmented tooling is especially valuable for shops that form boxes, brackets, and mixed-length parts. Instead of using one full-length punch, operators can build the needed tool length from sections and leave clearance where a part geometry requires it. The trade-off is more handling and a greater need for organized storage. Damaged or mismatched segments can quickly undermine repeatability.
Set Up for Repeatable Production
Even high-quality tooling will not compensate for a rushed setup. Clean the ram, die holders, clamps, and tool shoulders before installation. Small chips, rust, or burrs can create angle variation across the length of a bend. Verify that punches and dies are seated correctly, aligned, and securely clamped.
Check the press brake’s crowning system when forming long parts. Under load, the ram and bed can deflect slightly, causing the center of a long bend to open while the ends remain on angle. Mechanical or CNC crowning compensates for that deflection. The correct setting depends on material, length, tonnage, and tool configuration, so it should be confirmed with a test part.
Backgauge setup deserves the same attention as the tooling. Bent fingers, worn gauge surfaces, or poorly selected gauge positions can cause flange variation even when the bend angle is correct. For narrow parts or flexible sheet, use gauge positions that support the workpiece without allowing it to twist.
Before releasing a production run, inspect the first article for angle, flange dimension, bend radius, surface marks, and overall squareness. If the first part is inconsistent, stop and correct the root cause. Running more parts only turns a setup issue into scrap.
Inspect and Maintain Tooling Like a Production Asset
Press brake tooling is durable, but it is not indestructible. Inspect punches and dies for chipped edges, dents, galling, corrosion, and uneven wear. A damaged edge can leave marks on finished parts or create an inconsistent bend line. Worn tooling can also increase the risk of material slipping or deforming unpredictably under load.
Store tools in labeled racks or cabinets rather than leaving them on machine beds, pallets, or benches. Long, heavy tools are vulnerable to damage when handled with forklifts or lifted improperly. Organized storage also reduces setup time because operators can identify the required profile and length quickly.
Keep a record of tool profiles, lengths, capacities, and condition. For shops with multiple machines, that record helps prevent a common mistake: selecting a tool that physically fits the brake but is not rated for the planned load. It also gives purchasing and maintenance teams a clearer view of where replacement or additional tooling will create the most value.
Buying Used Tooling or a Used Press Brake
Used tooling can be a practical way to expand forming capability, particularly when acquiring common punch and die profiles. Inspect it closely for straightness, edge condition, corrosion, profile wear, and matching segments. Ask about the tooling system, manufacturer, load rating, and whether pieces have been modified. A low purchase price does not offset a tool that cannot produce reliable parts.
When buying a used press brake, evaluate the machine and tooling package together. A brake with modern controls but limited tooling may require a significant additional investment before it can support your workload. Conversely, a well-maintained machine with a broad, compatible tooling package can be ready to add capacity quickly.
Revelation Machinery helps manufacturers evaluate used fabrication equipment with the urgency and transparency required to keep operations moving. The strongest purchase decision is not simply the machine with the lowest price. It is the press brake, tooling, support, and delivery plan that lets your team make good parts without delay.
A well-chosen tooling package gives a press brake more than forming capability. It gives your operation options: the ability to quote a wider range of work, hold tolerances with confidence, and move from setup to production without sacrificing safety or margin.